Import from MS Excel Files
Oxygen XML Editor plugin provides two methods for importing MS Excel files into an XML file. The first method is to simply copy data from Excel and paste it into a document in Author mode, but this is only supported in DITA, DocBook, TEI, JATS, and XHTML documents. Oxygen XML Editor plugin also offers a configurable import wizard that works with any type of XML document.
Smart Paste Method
If you are importing data into DITA, DocBook, TEI, JATS, or XHTML documents, you can open the Excel spreadsheet in your office application, copy its content, and paste it into your document in Author mode.
The Oxygen XML Editor plugin Smart Paste mechanism will convert the pasted content to the equivalent XML markup and considers various pasting solutions to keep the resulting document valid, while preserving the original text styling (such as bold, italics, underline) and formatting (such as lists, tables, paragraphs).
Import Wizard Method
By default, this method supports importing Excel 97/2000/XP/2003 formats out-of-the-box. To import spreadsheet data from Excel 2007 or newer, additional libraries are needed before using this procedure. See Import Data from MS Excel 2007 or Newer for instructions on adding more libraries.
To use the Import wizard to import an Excel file into an XML file, follow these steps:
- Go to .
- Select the URL of the Excel file. The sheets of the document you are importing are presented in the Available Sheets section of this dialog box.
- Click the Next button to proceed to the next stage of the
wizard.
Figure: Import Wizard
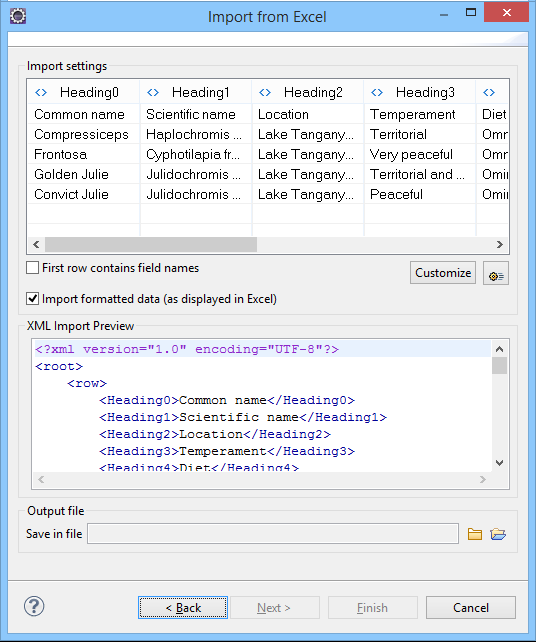
- Configure the settings for the conversion. This stage of the wizard offers the
following options:
- Import settings section
- Presents the input data in a tabular form. By default, all data items are
converted to element content (
 symbol), but this can be overridden by
clicking the individual column headers. Clicking a column header once causes the
data from this column to be converted to attribute values (
symbol), but this can be overridden by
clicking the individual column headers. Clicking a column header once causes the
data from this column to be converted to attribute values ( symbol). Clicking a second time causes the column data to be ignored
(
symbol). Clicking a second time causes the column data to be ignored
( symbol) when generating the XML file. You can cycle through these
three options by continuing to click the column header.
symbol) when generating the XML file. You can cycle through these
three options by continuing to click the column header. - First row contains field names
- If this option is selected, the default column headers are replaced (where such information is available) by the content of the first row. In other words, the first row is interpreted as containing the field names. The changes are also visible in the preview panel.
- Customize
- This button opens a Presentation Names dialog box that allows you to edit the name, XML name, and conversion criterion for the root and row elements. The XML names can be edited by double-clicking the desired item and entering the label. The conversion criteria can also be modified by selecting one of the following option in the drop-down menu: ELEMENT, ATTRIBUTE, or SKIPPED.
 Import
Settings
Import
Settings- Clicking this button opens the Import preferences page that allows you to configure more import options.
- Import formatted data (as displayed in Excel)
- If this option is selected, the imported data retains the Excel data formatting (such as the representation of numeric values or dates). If deselected, the data formatting is not imported.
- XML Import Preview panel
- Contains an example of what the generated XML document will look like.
- Save in file
- If selected, the new XML document is saved in the specified path.
- Click Finish to generate the XML document.